 |
|||||||
|
Android studio + PhoneGap + Mac – “Hello World” Andro…
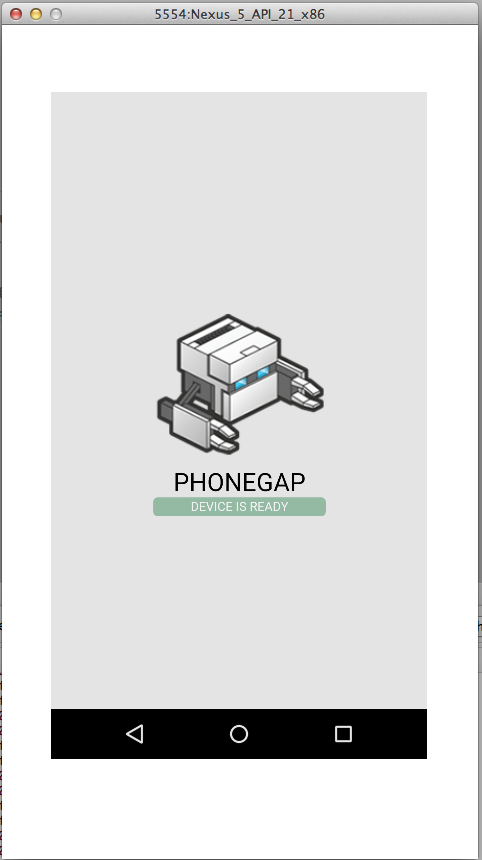
Below I explain how to get set up and run a “Hello World” Android application using Android Studio and PhoneGap.
|
|||||||
|
Preview by Yahoo
|
|||||||
- Download and install Node.js. Following installation, you should be able to invoke
nodeandnpmon your command line. If desired, you may optionally use a tool such asnvmornaveto manage your Node.js installation. - Download and install a git client, if you don’t already have one. Following installation, you should be able to invoke
giton your command line. Even though you won’t be usinggitmanually, the CLI does use it behind-the-scenes to download some assets when creating a new project. - Install the
cordovamodule usingnpmutility of Node.js. Thecordovamodule will automatically be downloaded by thenpmutility.- on OS X and Linux:
$ sudo npm install -g phonegap//cordova
- on OS X and Linux:
phonegap plugin add https://github.com/agamemnus/cordova-plugin-xapkreader.git
1. Starting with your project’s /myapp folder in Terminal, add the plugin:
cordova plugin add https://github.com/agamemnus/cordova-plugin-xapkreader.git
You should find com.flyingsoftgames.xapkreader in /myapp/plugins.
2. Open /platforms/android/project.properties in a text editor (I use TextWrangler) and add the following line under the last line:
android.library.reference.2=../../plugins/com.flyingsoftgames.xAPKreader/android-sdk/extras/google/play_APK_expansion/downloader_library
3. Open /plugins/android.json and replace these two values:
- com.sample.expansion with your company name/app info (for this example, we use com.companyname.myapp).
- YOUR_GOOGLE_PLAY_LICENSE_KEY with your Base64 number from the previous section.
ana kaynak:
http://cordova.apache.org/docs/en/3.5.0/guide_cli_index.md.html#The%20Command-Line%20Interface
diğer:
http://ankitthakkar90.blogspot.com.tr/2013/01/apk-expansion-files-in-android-with.html
ana kaynak bilgi:
cordova create myapp
cd myapp
cordova platform add android
Update the /myapp/config.xml:
<widget id="com.companyname.myapp" version="0.0.1"
Update the /myapp/platforms/android/AndroidManifest.xml with the proper minSDKversion (change 10 to 11):
<uses-sdk android:minSdkVersion="11"
Now let’s begin!
Resources:
http://developer.android.com/google/play/expansion-files.html
https://github.com/agamemnus/cordova-plugin-xAPKreader
Make Zip Archive Expansion File
We need to zip all our media files that won’t fit in the APK file. They should be stored, not compressed. We don’t need to download any special files for this zip utility; it’s already included in the OS.
Resources:
https://developer.apple.com/library/mac/documentation/Darwin/Reference/ManPages/man1/zip.1.html
http://developer.android.com/google/play/expansion-files.html
1. Move all of the expansion file assets into a folder called /myapp/main_expansion. (The main_expansion folder name will be part of the command in step 2.) If you have folders called /videos, /media, or /wallpaper, just drag the folders over to it.
My sample project for this article:
/www
    index.html
    /folder2
        file.html
/main_expansion
    wallpaper1.jpg
    /folder
        wallpaper2.jpg
        /subfolder
            wallpaper3.jpg
2. Starting in /myapp in the Terminal, run the following.

zip -v -dc -r -x \*.DS_Store -Z store main_expansion main_expansion
Explanation:
-v = give verbose output.
-dc = display running file count.
-r = Go through all the folders of main_expansion.
-x = do not include the following files (in this case, remove the .DS_Store files that are annoyingly generated by the Mac OS).
-Z store = just store the information in the archive, don’t compress it.
Returned:
0/ 6 adding: main_expansion/ (in=0) (out=0) (stored 0%)
 1/ 5 adding: main_expansion/folder/ (in=0) (out=0) (stored 0%)
 2/ 4 adding: main_expansion/folder/subfolder/ (in=0) (out=0) (stored 0%)
 3/ 3 adding: main_expansion/folder/subfolder/wallpaper3.jpg (in=943784) (out=943784) (stored 0%)
 4/ 2 adding: main_expansion/folder/wallpaper2.jpg (in=943784) (out=943784) (stored 0%)
 5/ 1 adding: main_expansion/wallpaper1.jpg (in=943784) (out=943784) (stored 0%)
total bytes=2831352, compressed=2831352 -> 0% savings
This indicates that /main_expansion is in a stored state with no compression within /myapp/main_expansion.zip. The Terminal should show a numbered listing of all the contents with their sizes and stored status of 0% compression for each.
Get the Base64 License Key and .obb Filename
Resource:
http://stackoverflow.com/questions/14015134/expansion-files-in-the-new-google-play-developer-console
1. Get the Base64-encoded RSA public key from your publisher account. To do that, the myapp APK must be uploaded to the store. Follow steps 1-8 on this link to create a release version suitable for Google Play upload: https://iphonedevlog.wordpress.com/2014/10/29/signing-an-android-APK-apart-from-eclipse-in-mac-os-x/
1. Sign in to your Developer Console at https://play.google.com/apps/publish/, and – IMPORTANT! – click on the Alpha Testing tab.
2. Click on “Upload your first APK to Alpha” and select the APK file for uploading.
3. After it’s uploaded, you’ll find a dropdown for the expansion file; select to upload the expansion file. The directory listing will appear for you to select the main_expansion.zip file.
4. Check that your APK expansion is shown. You should see “main.1.com.companyname.myapp.obb (xx.x MB)” in place. Jot down that information; you’ll need it later when testing the app on your device. If you don’t see this, select the APK expansion from the dropdown again. Click on Save. (obb = Opaque Binary Blob. Now you know.)
5. Go to Services & APIs. The Base64 License Key is shown. Keep that page open for the next steps.
6. Donate to the coder for this plugin. I did. We don’t really thank them enough, do we?
Integrate the Plugin
Michael Romanovsky wrote a plugin, xAPKreader (Expansion File APK Reader), that saves us a lot of time and aggravation that comes of following the expansion file steps on the Android Developer site.
Resource:
https://github.com/agamemnus/cordova-plugin-xAPKreader
1. Starting with your project’s /myapp folder in Terminal, add the plugin:
cordova plugin add https://github.com/agamemnus/cordova-plugin-xapkreader.git
You should find com.flyingsoftgames.xapkreader in /myapp/plugins.
2. Open /platforms/android/project.properties in a text editor (I use TextWrangler) and add the following line under the last line:
android.library.reference.2=../../plugins/com.flyingsoftgames.xAPKreader/android-sdk/extras/google/play_APK_expansion/downloader_library
3. Open /plugins/android.json and replace these two values:
- com.sample.expansion with your company name/app info (for this example, we use com.companyname.myapp).
- YOUR_GOOGLE_PLAY_LICENSE_KEY with your Base64 number from the previous section.
Format Links to the Expansion File Archive
Resource:
https://github.com/agamemnus/cordova-plugin-xAPKreader
The specific location of your expansion files in the device is in this pattern:
<path-to-shared-storage>/Android/obb/com.companyname.myapp/
You format your resource files in the project like this:
<img src="content://com.companyname.myapp/main_expansion/folder/wallpaper2.jpg">
Go ahead and change a few file links like above for testing. In my case, www/folder/wallpaper2.jpg was linked on www/index.html as:
<img src="content://com.companyname.myapp/main_expansion/folder/wallpaper2.jpg" width="500">
My sample index.html for this article:
<body>
 <br><h2>wallpaper1.jpg</h2><br>
<img src="content://com.companyname.myapp/main_expansion/wallpaper1.jpg" width="500">
 <br>
 <h2>folder/wallpaper2.jpg</h2><br>
<img src="content://com.companyname.myapp/main_expansion/folder/wallpaper2.jpg" width="500">
 <br>
 <h2>folder/subfolder/wallpaper3.jpg</h2><br>
<img src="content://com.companyname.myapp/main_expansion/folder/subfolder/wallpaper3.jpg" width="500">
<br><br><h2><a href="../index.html">../index.html</a></h2>
</body>
My www/folder2/file.html has the same contents as www/index.html, but it linked back to ../index.html instead of file.html.
Notes about linking to the expansion file contents.
- The zip file does not reside in www/. You make all links from all www folders and subfolders as though the expansion file was in the same folder. Example: in expansion file we have /folder/wallpaper2.jpg.
- In /www/index.html we link to it like this:
<img src=”content://com.companyname.myapp/main_expansion/folder/wallpaper2.jpg” width=”500″> - If the link to the same file is in /www/folderA/fileA.html, we link to the file the same way.
- If the link to the same file is in /www/folderA/subfolderB/fileB.html, we would link to the file the same way.
- The file URL is based on the file structure in the expansion file, not on the www/ structure.
Test the Expansion File from Your Desktop
Resources:
https://github.com/agamemnus/cordova-plugin-xAPKreader
http://developer.android.com/google/play/expansion-files.html#Testing
1. Important! – delete the following two folders so that the plugin generates the necessary files:
- /platforms/android/ant-build
- /platforms/android/ant-gen
2. Create a debug build with:
cordova build android
3. When we uploaded the zipped expansion file in the Developer console, Google renamed main_expansion.zip as main.1.com.companyname.myapp.obb
Go ahead and rename main_expansion.zip the same way.
4. Plug in your test device and create the shared folder:
Android/obb/com.companyname.myapp/
In the case of my Nexus 7, I plugged it into my PC and a window opened up with an option to show the folders. There was already an /Internal storage/Android/obb folder present. I right-clicked on that folder and selected New Folder, then renamed the folder com.companyname.myapp.
At one point, the window would not open to show the folders, and it turned out to be a poor cord in use. Switching back to the original cord worked. If that does not work for you, go into your Settings app and turn off USB Debugging.
5. Install the .obb file from step 3 in the device’s /obb/com.companyname.myapp/ folder you just made.
6. Install the CordovaApp-debug.apk file in the device. In my case, I copied the file to Dropbox on the desktop, then opened it in Dropbox on my device, tapped it and installed it. Test your app thoroughly. (It will be named HelloCordova if you created the app exactly as in these steps.)
7. Rename the .obb file back to the way it was for upload to Google Play, main_expansion.zip.
Test the Expansion File from the Developer Console
Google Play allows us to test a live download of the APK + expansion files to your device from Google Play while not making it available to the public. Here’s how.
1. You need to set up a private group of testers (or just yourself) with a Google Group account at https://groups.google.com/.
2. Create a group (mine was “myapp alpha testing”), which resulted in the email address of myapp-alpha-testing@googlegroups.com and URL of https://groups.google.com/forum/#!forum/myapp-alpha-testing
3. Privatize it. Still in Google Groups, for the Basic permissions section, “View topics” and “Post,” select “Owners of the group.” For Join the group, select “Only invited users.” Click on create to finish.
I received an automated welcome message in my gmail account.
4. Back on your computer, create a release version of your app as you did earlier.
5. On to the Developer Console at https://play.google.com/apps/publish/. Open the Alpha tab, click on the upload button, and drag in your new APK.
6. After that, you should see the expansion file listed. (If not, try again.) You may click on it to upload a replacement expansion file if needed. Below that is an option to upload a patch file.
Below that is a text box for you to state what’s new in this version.
Click on the Save button at bottom.
If you get the error message at top, “An unexpected error occurred. Please try again later. (0),” then click Cancel, sign out, then sign in again. It should then work. Click the Save button.
7. In the Alpha Testing tab, under “Alpha testers,” click on Manage list of testers.”
8. Enter the Google Group email, myapp-alpha-testing@googlegroups.com, then Add. The group name will be acknowledged underneath. Click Close.
7. You must publish the Alpha app before it can be sent to testers. Make sure all required fields for the app are filled in and saved, including images. Since this was only a practice app, I used dummy text and images from an earlier app. Click on Ready to publish > Publish this app.
8. Let’s do Alpha Testing. Click on Developer Console to get to your list of apps and click on myapp > APK.
9. In the Alpha Testing tab, under “Alpha testers,” click on Manage list of testers.”
10. You’ll see the link to send to your testers, https://play.google.com/apps/testing/com.companyname.myapp. Highlight it and copy it.
11. Create a “New Topic” in your Google Group, paste in the above URL, and Post.
12. Back in the welcome gmail email, I clicked on “Visit This Group” and signed in. I tapped on the link to enter, then on to a page welcoming me to “Become A Tester.” I accepted.
13. At the bottom appeared a link to download myapp from the Play Store. I was greeted with, “Item not found. Retry.” It just needed more time to work through the Play system. Clicking on it later, the Play Store page for myApp appeared. I clicked on the Install button, then Open — and received the message, “Unfortunately, HelloCordova has stopped.” Ouch. I hate it when that happens.
Upload Notes
1. When Google Play downloads your expansion files to a device, it saves them to the device’s shared storage location. To ensure proper behavior, you must not delete, move, or rename the expansion files. In the event that your application must perform the download from Google Play itself, you must save the files to the exact same location within the expansion file.
2. One of the great benefits of using expansion files on Google Play is the ability to update your application without re-downloading all of the original assets. Because Google Play allows you to provide two expansion files with each APK, you can use the second file as a “patch” that provides updates and new assets. Doing so avoids the need to re-download the main expansion file which could be large and expensive for users.
As long as you don’t change the main expansion file that’s associated with the APK in the Developer Console, users who previously installed your application will not download the main expansion file. Existing users receive only the updated APK and the new patch expansion file (retaining the previous main expansion file).
3. APK expansion files (e.g., audio files), as of 10/10/2014, cannot be run in conjunction with the Cordova Media plugin when using the xAPKreader plugin. Please see https://github.com/agamemnus/cordova-plugin-xapkreader/blob/gh-pages/media_plugin_workaround.txt for more details.
4. If you uninstall the xAPKreader plugin, the process will not undo your hand-made entries in the .xml files.